Riding a bike is wonderful, but if your cycle isn’t set up properly, it’ll completely detract from your enjoyment. The key is to fit the bike to you, rather than suffer by trying to fit yourself to it. To do this, you need to change the position of the bike’s contact points relative to one another.
The most important dimensions are the saddle-to-pedals distance and the saddle-to-handlebar distance. You may also want to change the contact points themselves, for something wider, narrower, longer, shorter or just more padded.
There is no definitive right and wrong, only what feels right to you. In particular, feel free to ignore any bike-fitting formulae that you may read in more technical cycling books and websites. These theories are just extrapolations of what people found tended to work for racing cyclists. They’re not gospel, and their usefulness for utility and recreational cycling is moot.
Saddle position
Most people ride with their saddle set far too low. This is inefficient because you can’t properly extend your leg muscles to get full power through the pedals. Here’s how to set your saddle height.
- Put on the shoes that you’ll normally be wearing on your bike.
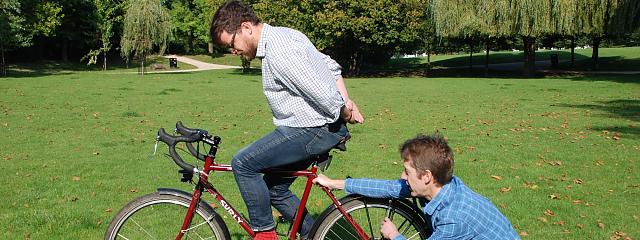
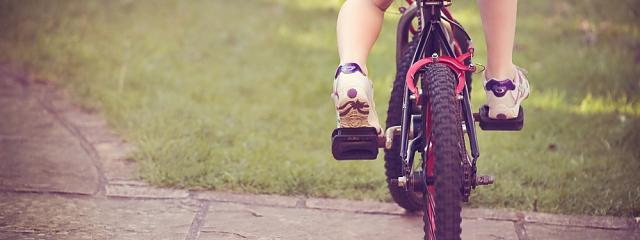
- Now, with the bike leaning against a wall or held up by a friend, sit on the saddle and put your feet on the pedals in the normal position – that is, with the ball of your foot over the centre of the pedal.
- Turn the cranks backwards until they are in line with the seat-tube. The leg at the bottom of the pedal stroke should be almost fully extended.
How much is almost? Repeat the above test with your heels on the pedals. One leg should be just about straight at the bottom of the stroke. Not stretching or straining and not bent, just straight. Now, when you put the balls of your feet on the pedals, ready to ride, your legs will be slightly bent at the bottom of the pedal stroke.
This is just a starting point. Less experienced riders, especially young children, may prefer the saddle lower so that they can get more than a toe on the floor when pausing at junctions and so on.
Mountain bikers sometimes have the saddle lower to be able to move the bike around better, while some road racers like it higher. It shouldn’t be so high that your pelvis rocks from side to side. That can do nasty things to the neat stack of vertebrae in your back or, more likely, the discs that sit between them.
Moving the saddle up and down is easy. Just undo and re-tighten the seat binder bolt at the top of the frame. Usually this will either be an Allen bolt or a quick release lever. Make sure you don’t exceed the ‘maximum height limit’ on the post, which will indicate that there’s only a short section still in the frame. If the saddle still isn’t high enough then you need a longer seat-post.
As well as up and down, you can also move the saddle fore and aft, albeit only by 3-5cm. You may need to do this to fine-tune the saddle-handlebar distance, which is known as reach.
Your bike probably has a micro-adjust seat-post with a single big (6mm) Allen bolted clamp that grips the saddle rails. Undo this and you can slide the saddle backwards and forwards to get the saddle to where it’s most comfortable.
Make sure this bolt is nice and tight when you’re done. Otherwise, if you go over a bump when you’re sitting down on the saddle it can come loose.
Undoing the saddle bolt also lets you tilt the saddle. To begin with, set it dead level (use a spirit level). Some cyclists, especially racers, prefer to tilt the nose of the saddle down by a few degrees. That’s okay, but bear in mind that it will put more weight on your wrists and hands. Don’t have the saddle pointing upwards. It will compress the nerves in your perineum, which can lead to pain or numbness.
If your bike has a plain seat-post then the clamp is integral to the saddle. There will be big (13mm) nuts either side of the saddle base. Undo each of these a small amount at a time, until you can move the saddle as above.
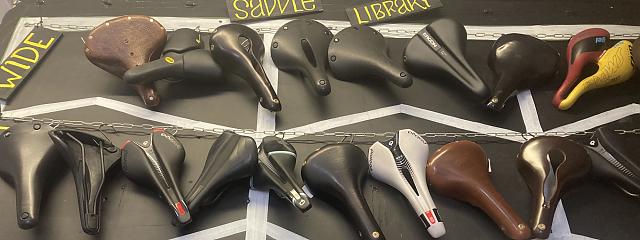
If the saddle is uncomfortable, change it!
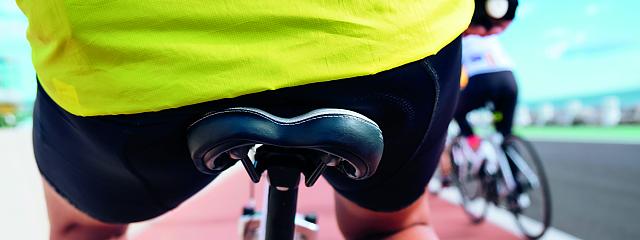
For short distances in an upright position, you need a fatter, softer saddle because it’s carrying all of your weight. For riding faster and further in a more leaned over riding position, the saddle is more of a perch than an armchair and needs to be thinner and harder.
For more information about finding a comfortable saddle if you are a woman read How to stop female saddle soreness.
Stem
The stem connects the handlebar to the steerer tube at the top of the fork. Stems come in a variety of lengths and angles, so you can have the handlebar just where you want it.
Changing the stem length affects the steering a bit – with a longer stem your hands will move through a larger arc than with a short stem, so you’ll have to move your hands further. This will make the steering feel ‘slower’.
But it’s not that big a deal and within the limits of a bike that’s your size to begin with it’s nothing you can’t get used to. Getting the contact points in the right place for you is more important.
As a general rule of thumb, you want the top of the handlebar about as high (or higher than) the saddle, unless you’re a sporty rider looking to ride fast.
Try touching your elbow to the nose of the saddle and reaching forward towards the handlebar with your hand. On a bike that fits, the horizontal distance from your fingertips to the stem’s handlebar clamp will likely be between two and four fingers’ width.
You can change the height of the handlebar by moving the stem up or down the steerer tube. If you have a stem that clamps to the outside of the steerer tube – a threadless stem – then there will be spacer washers below and/or above the stem itself. The stem can sit anywhere between, on top of or under these washers. If you’re leaning over too much, put the stem at the top of the stack, and vice versa.
To change the stem position, undo and remove the top cap. Loosen the bolt or bolts that clamp the stem to the steerer and lift it and any washers off. Slot them back on in your preferred order – the stem or top washer should overtop the steerer tube – but only do up the stem bolts loosely. Refit and tighten the top cap. Make sure the stem is in line with the front wheel and tighten its bolt(s) fully.
To change the height further with this kind of stem, you can flip it the other way up when you re-fit it (in which case, you will also have to refit the handlebar). Or you can buy a new stem with a steeper or shallower angle. It’s also possible to buy a ‘stem riser’ – a bolt-on extra bit of steerer tube.
Some bikes have a stem that clamps the steerer tube internally with a wedge bolt. Such stems look a bit like a number seven and are called quill stems. There’s usually a greater range of height adjustment than with threadless stems. As with seat-posts, you should not exceed the maximum height marker.
To raise the stem, undo the Allen bolt on top. To free the wedge inside, you will probably need to give the bolt (or Allen key) a smart tap with a wooden mallet. You can then move the stem up and down. When it’s at the right level, hold it steady while you tighten the stem bolt. Again, make sure the handlebar is in line.
Some bikes have an adjustable-angle stem. Both threadless and quill types exist. The advantage of such stems is not so much that you can change the position of the bars from ride to ride, but that there is a greater range of handlebar adjustment. Once you’ve found a position you’re happy with, you could buy a sturdier, lighter rigid stem with the same dimensions.
Handlebars
More width equals more leverage and easier control, but it also makes you less aerodynamic. Drop bars should be about the width of your shoulders, flat bars whatever you’re comfortable with. It can get expensive if you want to switch from drop bars to flat ones because the brake and gear levers will need changing too.
Drop handlebars don’t fix your hands in one position, so you’ll probably have no complaints – try cork or gel bar tape if you need to improve comfort.
With flat or riser bars your hands have just one position. Different bars will change the height of the handgrips, with riser bars giving you an extra bit of height – like having a taller stem.
Different bars can also have a different upward or backward sweep, changing the angle at which you hold your hands. You can also add clamp-on bar ends to give you an extra hand position. Cane Creek’s Ergo Grip bar ends are recommended by Dan Joyce, editor of Cycle magazine.
Butterfly or trekking bars are another way of getting multiple hand positions on a ‘flat’ handlebar. In particular, they’re useful for reducing reach since the ends loop back from the stem clamp.