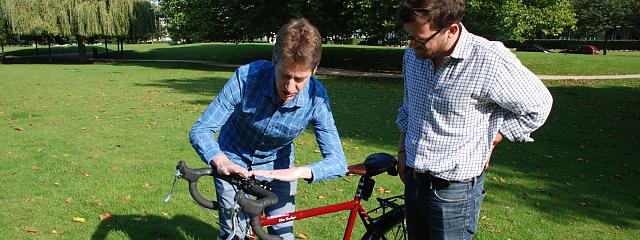
A well-maintained bicycle is not only a pleasure to ride but safer and more reliable than one that is neglected and allowed to deteriorate. Effective maintenance is an on-going process that keeps the bike in good working order at all times
It depends not just on ‘scheduled’ activity such as an annual overhaul but on continual observation and immediate rectification when a problem, potential or actual, arises. The points noted here are vital to safe operation and can be checked both before a ride, and in some cases such as brake block wear, during if conditions dictate.
In fact, the key to keeping a bike running sweetly is to address any noted issues at the end of one ride rather than the beginning of the next – when you really just want to get on your bike.
Tyres
Some cyclists check their tyre pressure before every ride; others occasionally or only when it drops enough to suggest a slow puncture. If the former seems a little obsessive, the latter is asking for sub-optimal performance, handling and tyre life. At the least, it is worth doing every few days, since inner tubes slowly leak pressure.
Any major pressure drop over a couple of days or so suggests a slow puncture, which should be found and fixed before setting off.
Exactly how hard to inflate tyres is a tricky question dependent on tyre size and rider weight, but the allowable pressure range for most tyres is fairly wide. They should be neither so hard you feel every tiny imperfection in the road surface nor so soft that they lack stability on corners.
If you check them regularly and try out various settings, you’ll get an idea of what suits you and can stick to that for predictable handling.
Tyres should also be inspected regularly for damage such as a cut or bulging sidewall, which may fail without further warning. Small flints embedded in the tread can be picked out; a cut that does not reach the fabric of the tyre carcass will not affect its integrity.
Finally, check for tread wear. Tyres wear out – and become more susceptible to punctures as they do so. The rear inevitably wears faster and is easy to overlook. If you can see canvas in the middle of the tread, you have let matters slide too far.
Brakes
Brake failure is potentially lethal and it is vital to start any ride with brakes that not only work as designed, but which can be expected to do so for the duration of the ride. This is surprisingly easy to overlook but brake blocks – or pads if you ride discs – can wear very quickly in adverse conditions.
If the friction material wears away completely, leaving the shoe or backing plate rubbing against rim or disc, you will have no brake – possibly just when you need it most.
Keep an eye on brake block or pad thickness. This is where regular inspection really pays off; you will be able to get an idea of the rate at which your blocks wear in fair and foul weather.
For short outings, there’s no need to replace them until they reach whatever wear limit indicator is provided by the manufacturer. If you are about to embark on an Alpine sportive in the rain or a gravel race, though, it is well worth fitting new ones and, if keeping costs down is important, saving the part-worn examples for less demanding occasions.
Also important for rim brakes is an occasional check on brake block height. This can change as the block wears and the brake arm moves further to bring it up to the rim.
In extreme cases, and depending on brake type, the block may ‘over-top’ the braking surface, in which case the lip that then forms on it may slice through the tyre wall, or it may slide under the braking surface and jam. Check and adjust if necessary before this can happen.
The immediate pre-ride check should also ensure that both brakes actually work, with a hard squeeze on each lever, and where rim brakes are fitted, that clearance with the rim is correct. Each brake should have an adjuster to take up slack; with any quick-release mechanism closed, the blocks should reach the rim with the lever pulled no more than halfway to the handlebar.
Finally, to prevent rub, ensure that both blocks are equidistant from the rim and adjust as required.
Headset
A worn headset or steering bearing can be dangerous and certainly detracts from riding pleasure. Check for bearings that are overtight, not tight enough or worn.
There must be no discernible ‘free play’, or slack. An easy way to check this is to apply the front brake and rock the bike back and forth; any slack in the headset can easily be felt.
Tighten the headset to eliminate free play, then lift the front of the cycle using the top tube and gently push the handlebars to one side. They should move smoothly and freely; if so, all is good. If the play can’t be adjusted out, the bearings may be a loose fit in the frame and should be checked by a competent mechanic.
If the bars don’t turn freely, the headset is probably slightly too tight, in which case slacken it and go through the adjustment process again. A headset that does not turn freely impairs handling and can cause a dangerous riding condition, so don’t ignore it.
If the headset feels rough and notchy, the bearings have become pitted through use and should be replaced.
Wheels
Simply spinning each wheel while stationary will reveal if it has gone out of true and needs attention. Otherwise, feel for bearing play by rocking the wheel sideways while clamped in the frame and adjust or replace if required.
There are a couple of important safety checks to make concerning wheels. If your bike has rim brakes, keep an eye on the braking surface tracks, which may gradually wear away as the brakes are used.
This effect, which may take as little as a winter’s use, is most pronounced in poor weather conditions and at the rear wheel, and in extreme cases the rim can wear until it is thin enough to crack and possibly break from the air pressure inside the tyre.
Many rims have wear markers in the brake tracks, but if these are lacking look for the development of a pronounced concave surface where the blocks touch the rim and, if found, have the rim replaced.
Quick release
The other daily check is to ensure that the wheel nuts or quick-release mechanisms are secure before riding. This is especially important at the front, even where ‘safety’ tabs are fitted; for a quick check, lift the front of the bike and hit the top of the tyre with a fist.
Transmission
There’s little to check on a smooth-running transmission, since hub and indexed derailleur transmissions rarely go out of tune suddenly, but they may wear and need adjustment over time. Do this at any suggestion of imprecise shifting.
A weekly look at chain wear, ideally using a ‘chain checker’, will reveal when it should be replaced for optimal performance.
Handlebars/saddle
Although rarely giving trouble if correctly assembled, the handlebars, stem and saddle fasteners should be inspected from time to time for security.
Many contemporary lightweight stems and seat post clamps use small threaded fasteners with recommended torque settings that can be easily checked using a suitable torque wrench. It is not a good idea to try tightening such fasteners without a torque wrench, so if you don’t have one, get them checked professionally if you have any questions.